These pages are provided to my students and close clay friends. Please do NOT put these links out on social media! While I realize that this is still a public page, it’s really for our use only. THANKS
UPDATED 7/25/17: Check out my BBJ video on YouTube for this Raku style:
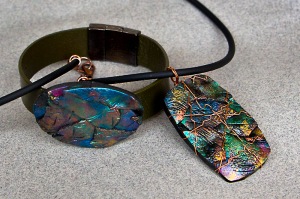
Urban Raku by syndee holt
- Sculpey Souffle Poppy Seed – 1 package (I like to use Souffle for this project because it doesn’t tend to stretch as much when we tear it.)
- Sculpey Clay Conditioning Machine
- Sculpey Super Slicer
- Sculpey Circle or Oval cutters
- Sculpey Gloss Glaze or Pearl Ex Varnish and small soft brush
- Jacquard Pearl Ex – For the green/blue version: Spring Green, True Blue, Flamingo Pink, Gold and Super Copper (Series 2 plus copper) For the Copper version: Super Copper, Super Russet, Sunset Gold, Super Bronze (Series 1)
- Citadel Paints for Copper version: Nuln Oil Shade and Nihilakh Oxide Technical (for information on paints: https://synssculpeyblog.wordpress.com/class-info/information-on-paints/
Have on Hand:
- Templates to cut shapes and craft blade
- Piece of course sandpaper or step grit tape (to prevent slips)
- Small smooth tile
- 5 inch metal bowl or bakeable ceramic bowl/mug or Sculpey Hollow Bead Maker for round shapes (shown)
Gel glue
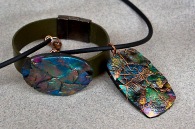 To Create the Traditional Color RAKU:
Step 1:
Roll a small piece of the conditioned clay through the Sculpey Clay Conditioning Machine on the #5 (thin) setting. Place on a sheet of paper.
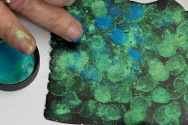
Use your finger to dot on small amounts of each color – I start with my favorite color and add more, ending with Copper or Gold for each one.
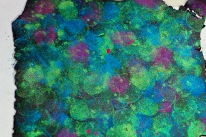 Step 3: By the time you add the Spring Green, True Blue, Flamingo, and finish with the Super Copper, your sheet should be completely covered with dots of color.
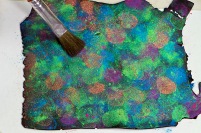 Step 4: Use a soft brush to LIGHTLY brush across the top to remove excess powder and to blend the colors slightly. This also removes any telltale fingerprints.
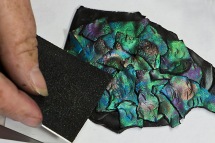
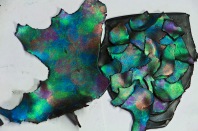 Step 5: Roll out another sheet of the Poppy Seed clay on the second from widest setting that is at about 3×3 inches. Tear small pieces of the thin sheet of clay and collage them onto this sheet of clay. Try not to pull and stretch the clay as you tear it!
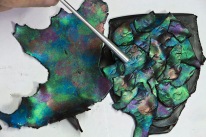 Step 6: Use a large Etch n’ Pearl or your fingernails to texture the clay. I like to use my nails since it’s kind of payback for all those times I’ve had to try to remove those telltale half-moons accidentally caused by my nails!
Once the sheet of clay is covered, use the small piece of sandpaper or safety tread to texture the top surfaces of the clay.
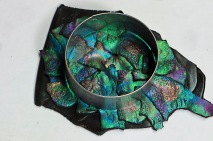
Use the selected cutter or template to cut out your shape and place on the curved bowl or Sculpey Hollow Bead Maker. Bake as directed above.
Step 9:
Once the clay is baked and cooled, you can apply a light coat of Sculpey Glaze to seal the surfaces. I dip my brush in water and then just the tip of the brush into the glaze to make a thin coat with no strokes.
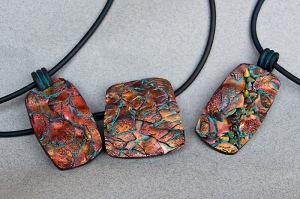 To Create the Copper “Urban Raku”
This color combination uses the Series 1 colors of: Super Copper, Super Russet, Sunset Gold, Super Bronze as well as the Citadel paints for the Copper Version listed above.
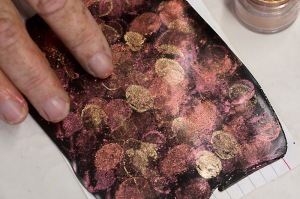 Use the same steps as described above, but using the alternate Copper colors. Once the piece is baked and cooled, apply the Nuln Oil to the cracks and crevices (and those half-moons from your nails). Allow this to dry before applying the Nihilakh Oxide to the textures. Blend the Oxide with your fingers for a more natural look. Apply a thin protective glaze coat by dipping your glazing brush in water and then lightly into the Sculpey glaze.
