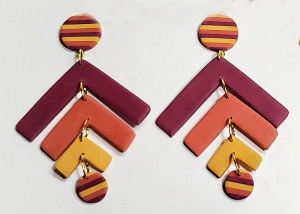
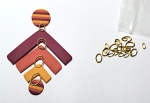
I wanted to play more with my color blends from NCT this week. So these three colors are 2:1 mixes of Soufflé Grape, Canary and Guava mixed with Soufflé Cinnamon.
What you may need to do this project:
- Conditioned, mixed clay – roughly about 3/4 package – 3 colors YOUR CHOICE!
- The usual – pasta machine, blade, worksurface
- Sculpey nested cutters – Square and Circle
- Sculpey Mini Cutters-Geometric (because those finish out the sets above! Add the circle to your circle set and the square to the square set)
- package gold-toned oval jump rings in assorted sizes
- 2 gold toned eye pins
- 2 post backs
- instant glue (Amazon)
- jewelry tools to open/close jump rings
- Jewelry drill (also called a pin vise) – mine is a Games Workshop/Citadel drill (Amazon)
- Also have on hand:
- Paper on your work surface (I recycle printed sheets from my office by folding printing to the inside)
- Patty paper – those little square sheets are sooo useful
- Deli sheets – these are thin plastic
- I use a small block of wood to drill on
- Small smooth tile
Step 1:
Select or mix your three colors. Sheet out the clays on a medium setting (this is #3 on my Monified/Ed Street 180 pasta machine)
Step 2:
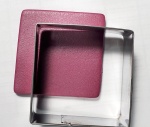 Use the 1.75 inch (45mm) square to cut the largest color. I stacked my colors from dark to light. (not by favorite color darn it!) Once you cut the square, shift the cutter down about 3/8 inch (9.5mm) and cut again to make the angle. Repeat for the other earring. Set these on your baking surface (a cardboard box flap for me)
Step 3:
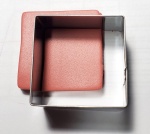 Sheet out the next mix and select the cutter two sizes down from the first, which is the 1.25 inch (32mm) cutter and repeat step one. This section can have a slightly smaller width than the first color section. Make two!
Step 4
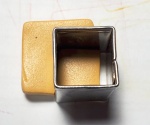 Sheet out the last (lightest) color and repeat using the cutter two sizes smaller than the last one, which is the .75 inch (19mm) cutter. This section will be also cut slightly smaller in width.
Now my bake sheet looks like this!
I decided to add some stripes to my top and bottom circles – you can do plain circles, or stack larger and smaller circles of each color..
Step 5
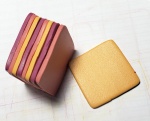 Using the first cutter, I cut out 3 squares of each color and stacked them the same way as the arrows I’ve cut. Press them LIGHTLY together.
Step 6
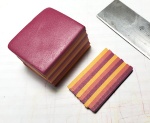 Set the stack on edge and cut a thing slice off the edge to get a clean edge. Now make about 3 slices that are about as thick as your widest setting on the pasta machine. I find that if I set my stack at an angle (as shown above) and make my cut I can watch from both the top and the side to make sure my cut is even. You can stand the stack up and cut that way as well.
Step 7
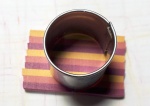 CAREFULLY and slowly run each slice through the pasta machine at the same setting you did your arrows (#3 for me). Making sure that you keep the stripes perpendicular to the machine. This is tricky with a foot pedal. Use the .75 inch (19 mm) circle to cut out two circles of stripes. Place these on your baking sheet. NOTE: Try to cut the circles the same by lining up the stripes the same!
Step 8
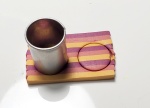 Using the small round cutter from the Mini Cutter Geometric set, cut two more small circles for the bottom of the earrings.
Step 9
Bake those earrings now – I bake at 275F for 30 minutes.
Step 10
 I think that this is the coolest thing about Soufflé – of course those layers molded together right? Well, look at the rest of the stack – if you didn’t run it through the pasta machine, you can just peel those layers apart and there will be no color transfer! You can return them to the original ball of color or use them like I did in the Part Two Tutorial for the pendant. Set aside your scraps for now…
Step 11
I decided to use an eye pin in the bottom of the top circle so that the earrings could swing easily from the post. The eye pin connects to the top arrow with a slightly smaller oval jump ring. Then 3 larger ovals for the other pieces to connect.
NOTE: before the next step, you may want to put your post onto the back of the circle. Either glue it into place or make a small thin circle of clay and poke a small hole in the center. Add a drop of Bake n’ Bond to the back of the round piece, position the post and slide the circle of clay over the post. Press firmly into place and rebake. It was easier for me to show you the final steps and photograph the earrings without the post in place. Of course you can opt for ear wires instead of a post as well!
Step 12
 Soufflé is so easy to drill, I always wait to drill after baking. I have several small pieces of wood that I asked my handyman to cut up for me and I use those to drill on (because I got tired of drilling my finger!) Drill the arrows at the top and bottom of the point.
Step 13
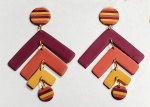 Assemble the pieces with the jump rings and you are done!
Check out the second part of this tutorial called Scrap Play Pendant!
